 8/25/2015 08:48:00 SA
Services
Notification
------------------
1. Services
2. Notification:
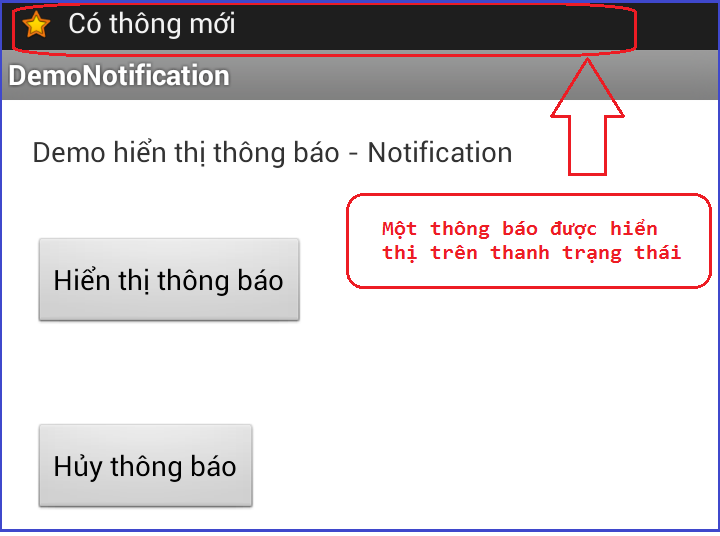
- Notification là thông báo, thông điệp được hiển thị trong một thời gian ngắn trên thanh trạng thái của thiết bị nhằm gây sự chú ý của người dùng. Đây là một tính năng quan trọng của smart phone.
- Hình vẽ dưới đây ví dụ về notification được gởi tới trên thanh trạng thái:

2.1 Hướng dẫn gởi notification từ server đến các thiết bị có cài ứng dụng:
- (0): xem hướng dẫn link https://www.youtube.com/watch?v=0idgOOQHxHg&ebc=ANyPxKqHVRxCyI4iYVY7l6LNHeoBZc50dFf91ipyKAyxx_47zY8seN6EHPib-uLu9qnLI2jCdONrTjUao6u0EBJBL6drh4dJvg
- (1): Tạo một project trên trang https://console.cloud.google.com/project
Lưu ý 2 số API keys và Project Number của project vừa tạo cụ thể:
API keys: dùng cho project trong https://pushbots.com
Project Number: dùng cho tệp tin pushbots.xml chỗ <!-- GCM Sender ID -->
- (2): vào trang https://pushbots.com/ tạo một tài khoản
- (3): làm theo hướng dẫn https://pushbots.com/developer/docs/android-sdk-integration
Lưu ý ở Step 3: Creating pushbots.xml config file:
<?xml version="1.0" encoding="utf-8"?>
<resources>
<!-- Pushbots Application ID -- tức là ID của App bên trang Pushbots.com -->
<string name="pb_appid">548ef5901d0ab1</string>
<!-- GCM Sender ID -- tức là Project number bên trang google -->
<string name="pb_senderid">48849973</string>
<!-- Pushbots Log Level log Tag "PB2" -->
<string name="pb_logLevel">DEBUG</string>
</resources>
--> kết quả: lưu ý không chạy được trên Genymotion
3. Gắn quảng cáo vào ứng dụng:
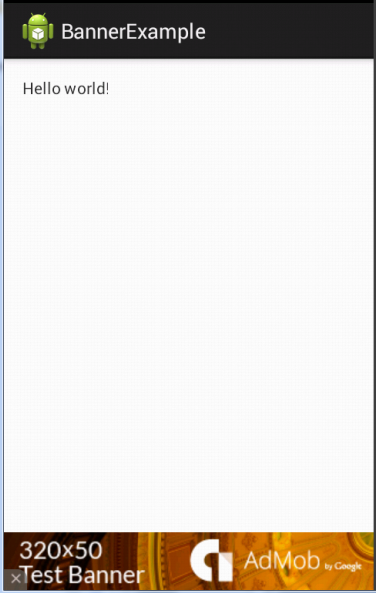
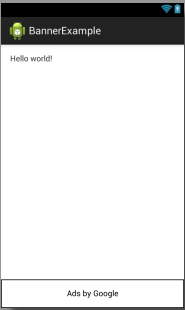
- Một số ứng dụng được phân phối miễn phí nhưng vẫn có thu nhập nhờ gắn quảng cáo. Bài này giới thiệu gắng quảng cáo của google (AdsMob)
- Giao diện chương trình demo:
 Thiết kế layout:
XML code:
Activity code:
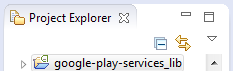
Cần import google-play-services_lib project vào dự án từ:
Từ eclipse --> chọn File --> chọn Import --> import --> chọn Android --> Existing Android Code Into Workspace --> chọn đường dẫn tới dự án --> Ok google-play-services_lib vào (đường dẫn bên dưới)
<android-sdk-directory>/extras/google/google_play_services/libproject/google-play-services_lib
 --> Sau đó right click vào your project --> chọn properties chọn Add: google-play-services_lib
 Tệp tin AndroidManifest.xml:
Cách lấy mã ID AdMob để đặt quảng cáo kiếm $ từ AdMob google:
Vào trang: https://apps.admob.com đăng nhập bằng tài khoảng gmail.
Lưu ý: trong hình là lấy id Admob ví dụ của google nên sẽ không được tính $
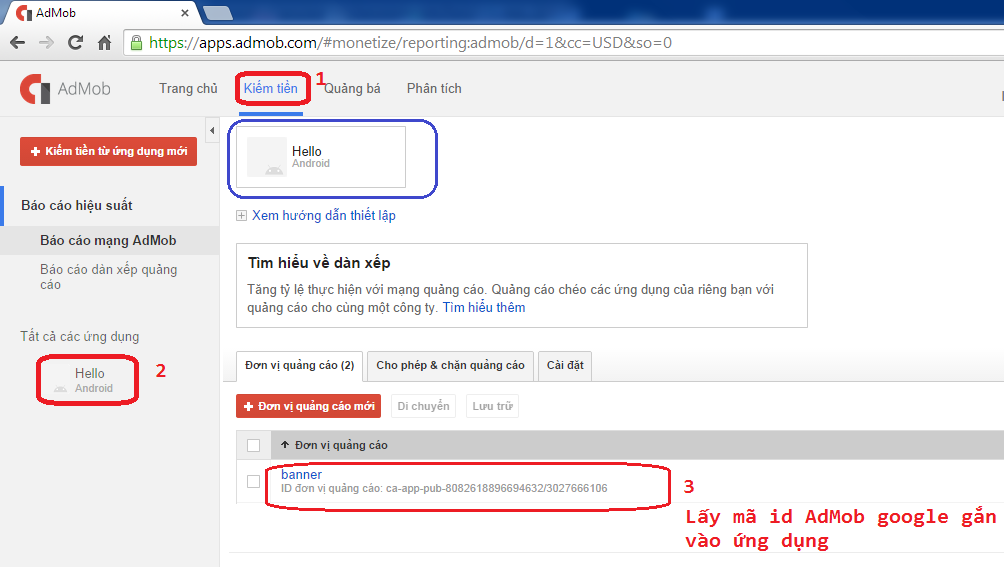
id demo: ca-app-pub-8082618896694632/3027666106
Download source:
https://drive.google.com/file/d/0B8tAQ0_sJKCSaUtfcE5jTjdsdG8/view?usp=sharing
Bài tập:
1.
2.
Notification
------------------
1. Services
2. Notification:
- Notification là thông báo, thông điệp được hiển thị trong một thời gian ngắn trên thanh trạng thái của thiết bị nhằm gây sự chú ý của người dùng. Đây là một tính năng quan trọng của smart phone.
- Hình vẽ dưới đây ví dụ về notification được gởi tới trên thanh trạng thái:
Có 2 cách để đẩy thông báo lên thanh trạng thái:
- Cách 1: Gởi Notification từ location, từ chính thiết bị điện thoại.
- Cách 2: Gởi Notification từ server đến tất cả các thiết bị điện thoại có cài ứng dụng đó. (hơi khó để cài đặt)
2.1 Hướng dẫn sau làm notification từ location: Xây dựng ứng dụng hiển thị thông báo notification như ví dụ trên
Cấu trúc dự án:
Mã nguồn Java:
//1. Khai báo biến quản
lý notification
NotificationManager
notification_manager =
(NotificationManager) getSystemService(Context.NOTIFICATION_SERVICE);
(NotificationManager) getSystemService(Context.NOTIFICATION_SERVICE);
//2. Khai báo icon,
tiêu đề thông báo, thời gian
int icon = R.drawable.star;//hình để hiển thị theo
thanh thông báo
Notification
notification = new Notification(icon, "Đến giờ hát karaok",
System.currentTimeMillis());
//3. Thiết lập nội dung
chi tiết của thông báo
Intent intent = new Intent(MainActivity.this, ThongBaoActivity.class);
PendingIntent
pendingintent = PendingIntent.getActivity(MainActivity.this, 0,
intent, 0);
notification.setLatestEventInfo(MainActivity.this, "Tiêu đề",
"Nội dung thông
báo",
pendingintent);
//4. Kích hoạt
notification
int notificationId = 1;
notification_manager.notify(notificationId,
notification);
Download source code:
https://drive.google.com/file/d/0B8tAQ0_sJKCSYTFIS0JPRFR2NmM/view?usp=sharing
https://drive.google.com/file/d/0B8tAQ0_sJKCSYTFIS0JPRFR2NmM/view?usp=sharing
2.1 Hướng dẫn gởi notification từ server đến các thiết bị có cài ứng dụng:
- (0): xem hướng dẫn link https://www.youtube.com/watch?v=0idgOOQHxHg&ebc=ANyPxKqHVRxCyI4iYVY7l6LNHeoBZc50dFf91ipyKAyxx_47zY8seN6EHPib-uLu9qnLI2jCdONrTjUao6u0EBJBL6drh4dJvg
- (1): Tạo một project trên trang https://console.cloud.google.com/project
Lưu ý 2 số API keys và Project Number của project vừa tạo cụ thể:
API keys: dùng cho project trong https://pushbots.com
Project Number: dùng cho tệp tin pushbots.xml chỗ <!-- GCM Sender ID -->
- (2): vào trang https://pushbots.com/ tạo một tài khoản
- (3): làm theo hướng dẫn https://pushbots.com/developer/docs/android-sdk-integration
Lưu ý ở Step 3: Creating pushbots.xml config file:
<?xml version="1.0" encoding="utf-8"?>
<resources>
<!-- Pushbots Application ID -- tức là ID của App bên trang Pushbots.com -->
<string name="pb_appid">548ef5901d0ab1</string>
<!-- GCM Sender ID -- tức là Project number bên trang google -->
<string name="pb_senderid">48849973</string>
<!-- Pushbots Log Level log Tag "PB2" -->
<string name="pb_logLevel">DEBUG</string>
</resources>
--> kết quả: lưu ý không chạy được trên Genymotion
- Một số ứng dụng được phân phối miễn phí nhưng vẫn có thu nhập nhờ gắn quảng cáo. Bài này giới thiệu gắng quảng cáo của google (AdsMob)
- Giao diện chương trình demo:
XML code:
<RelativeLayout xmlns:android="http://schemas.android.com/apk/res/android"
xmlns:tools="http://schemas.android.com/tools"
xmlns:ads="http://schemas.android.com/apk/res-auto"
android:id="@+id/container"
android:layout_width="match_parent"
android:layout_height="match_parent"
android:layout_marginTop="@dimen/activity_vertical_margin"
tools:context=".MyActivity"
tools:ignore="MergeRootFrame">
<com.google.android.gms.ads.AdView
android:id="@+id/ad_view"
android:layout_width="match_parent"
android:layout_height="wrap_content"
android:layout_centerHorizontal="true"
android:layout_alignParentTop="true"
ads:adSize="BANNER"
ads:adUnitId="Mã code id quảng cáo"
/>
</RelativeLayout>
import
com.google.android.gms.ads.AdRequest;
import
com.google.android.gms.ads.AdView;
@Override
protected void onCreate(Bundle
savedInstanceState) {
super.onCreate(savedInstanceState);
setContentView(R.layout.activity_my);
AdView mAdView = (AdView)
findViewById(R.id.ad_view);
AdRequest adRequest = new AdRequest.Builder()
.addTestDevice(AdRequest.DEVICE_ID_EMULATOR)
.addTestDevice("INSERT_YOUR_HASHED_DEVICE_ID_HERE")
.build();
.addTestDevice("INSERT_YOUR_HASHED_DEVICE_ID_HERE")
.build();
// Start loading the ad
mAdView.loadAd(adRequest);
}
Cần import google-play-services_lib project vào dự án từ:
Từ eclipse --> chọn File --> chọn Import --> import --> chọn Android --> Existing Android Code Into Workspace --> chọn đường dẫn tới dự án --> Ok google-play-services_lib vào (đường dẫn bên dưới)
<android-sdk-directory>/extras/google/google_play_services/libproject/google-play-services_lib

<?xml version="1.0"
encoding="utf-8"?>
<manifest xmlns:android="http://schemas.android.com/apk/res/android"
package="com.google.android.gms.example.bannerexample"
>
<!-- Include required permissions for
Google Mobile Ads to run-->
<uses-permission android:name="android.permission.INTERNET"/>
<uses-permission android:name="android.permission.ACCESS_NETWORK_STATE"/>
<application
android:allowBackup="true"
android:icon="@drawable/ic_launcher"
android:label="@string/app_name"
android:theme="@style/AppTheme"
>
<!--This meta-data tag is required to
use Google Play Services.-->
<meta-data android:name="com.google.android.gms.version"
android:value="@integer/google_play_services_version"/>
<activity
android:name=".MyActivity"
android:label="@string/app_name"
>
<intent-filter>
<action android:name="android.intent.action.MAIN"
/>
<category android:name="android.intent.category.LAUNCHER"
/>
</intent-filter>
</activity>
<!--Include the AdActivity configChanges
and theme. -->
<activity android:name="com.google.android.gms.ads.AdActivity"
android:configChanges="keyboard|keyboardHidden|orientation|screenLayout|uiMode|screenSize|smallestScreenSize"
android:theme="@android:style/Theme.Translucent"
/>
</application>
</manifest>
Vào trang: https://apps.admob.com đăng nhập bằng tài khoảng gmail.
Lưu ý: trong hình là lấy id Admob ví dụ của google nên sẽ không được tính $
id demo: ca-app-pub-8082618896694632/3027666106
Download source:
https://drive.google.com/file/d/0B8tAQ0_sJKCSaUtfcE5jTjdsdG8/view?usp=sharing
Bài tập:
1.
2.
 Chuyên mục